Why it's important to clean your photographic material before scanning and archiving
We can't emphasize how important it is to properly clean your photographic material before scanning or archiving it. Dust and debris are the number one source of damaging negatives and slides. Even photographical prints can be damaged over the years.
This is especially important when you like to scan your images. Each dust particle can hide important details of an image. Therefore it is important to minimize the level of dust and debris when scanning your images.
Why high-quality scans are so important for proper photo restoration
Properly preparing your photographic material for photo restoration is crucial for the best results and cheapest quotes. Think about it. The professional does not have to charge you for the time he is spending on manually cleaning your photographs from tiny dust particles which could have been cleaned off in the first place.
Cleaning is key
The key to doing so is cleaning photographic material from impurities like chemical residues, dust, and other particles. Whereas some of these actions can be performed easily at home with just some extra and cheap appliances others need some more experience and equipment.
Clean your scanner too!
Keeping your scanner clean and dust-free is as important as cleaning your negatives and prints. Covering your scanner with a dust cover does not only save you a lot of cleaning-time but can also extend the lifetime of your scanner.
Working precisely and properly
Do things once and for all. Take your time for each step. Rushing through the process just means that at some point you have to redo the whole process of unpacking, cleaning, scanning and archiving again.
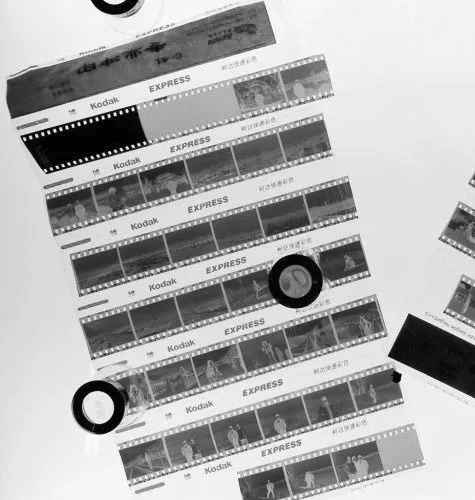
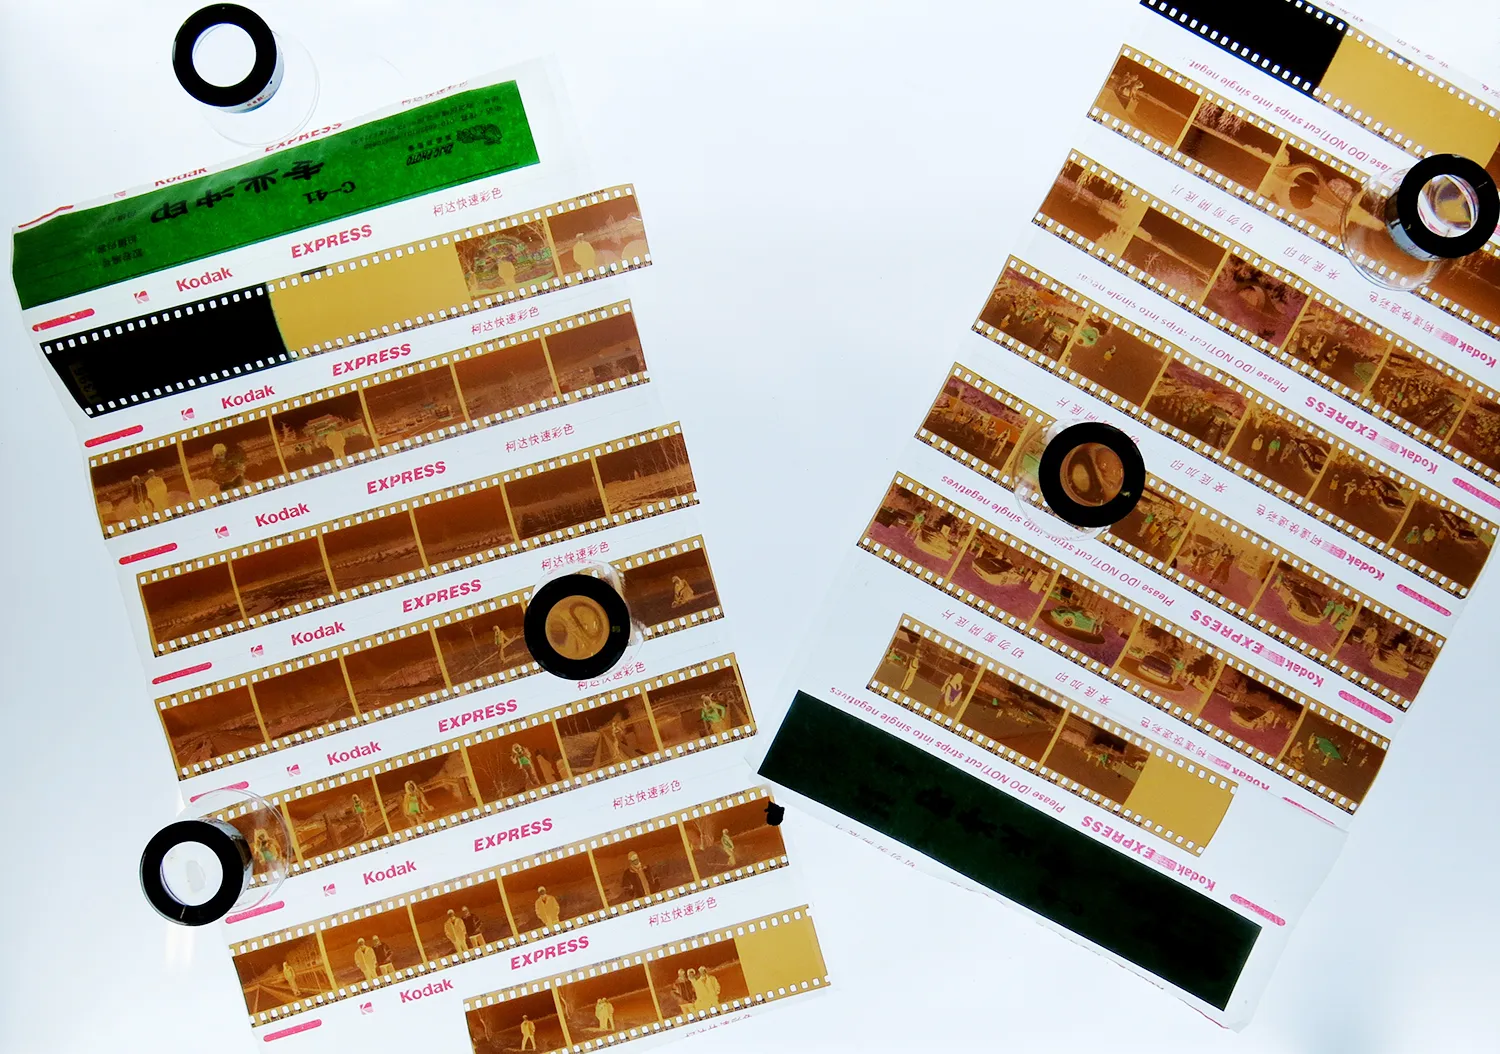
Cleaning photographic material from dust and other particles
Dust will affect all photographic material you possess and it's the number one reason why scans lack quality. Photographic prints are not as much affected by this as negatives and slides. This is especially true for 35mm film. Because the photographic material is only 24mm x 35mm even tiny dust particles cover a relatively large area of your negative or slide.
Why cleaning is better than using Digital ICE
It's always better to physically clean negatives or slides than applying Digital ICE to your scan. All these technologies use computer prediction to repair these areas and can't be compared to photo restoration.
What you need for cleaning
- Gloves (one-time plastic or high-quality reusable)
- Compressed clean air in cans or a blower
- Microfibre cloth (cleared for sensitive surfaces)
- Soft brush (cleared for delicate surfaces)
- Anti-static cleaning solution with non-abrasive cleaning pads (professional method)
Why you shouldn't blow with your mouth
Your relatively hot breath will condense on the surface of the negative. This can become a real issue when you try to put it into the archiving sleeve. It will stick to it or even worse over time cause mold.
How to get rid of dust and why your bathroom is the best place for that
The best place to get rid of the dust on your negatives and slides is the bathroom. Run hot water through the shower for a couple of minutes and then wait for 10 minutes for the steam to settle down. The evaporating steam will fix all dust particles in the air and then sink to the floor.
The right storage
Use sleeves when archiving them. There are two different kinds: Plastic and glassine. Plastic ones cover your material tightly and prevent dust from entering but are more prone to mold. Glassine paper sits loose, allows air circulation, and prevents mold but dust can enter more easily.
Using microfibre cloth
Make sure to not use the standard household clothes. Use microfibre cloth cleared for sensitive surfaces like lenses or sensors.
Using a brush
A soft brush cleared for delicate surfaces allows better control of the pressure you're applying.
The professional way
Use an anti-static cleaning solution applied with special non-abrasive cleaning pads. Use each pad only once.
Summary – Cleaning photographic material from dust and other particles
1. Put your cleaned material in sleeves to prevent dust from recovering it.
2. If compressed air is not enough, use a special microfibre cloth, brush, or professional anti-static cleaning solution and pads.
3. Before cleaning with a cloth or brush, use compressed air first.
4. Put on gloves before touching your negatives or slides.
5. Minimize dust pollution in the room - the bathroom is best due to its humidity.
6. Physical cleaning is always better than Digital ICE and other software features.
7. The smaller the dimensions, the more dust becomes an issue.
Water stains and chemical residues on negatives and slides
These issues get caused due to improper treatment during the development process of the negative. The residues are mineral-based which means you can get rid of them simply by using distilled water. Use Photoflo for your final rinse to reduce drying time and water stains.
Steps for cleaning negatives from chemical residues:
1. Check whether your bathroom is suitable. Make sure it is as dust-free as possible.
2. Run hot water through your shower for a couple of minutes.
3. Find three clean bowls or basins.
4. Rinse with flowing tap water for about 10 minutes.
5. Transfer the cleaned negative to a bowl with distilled water. Leave it in there for a couple of minutes.
6. Transfer again to a bowl with distilled water and Photoflo.
7. Take it out and use a darkroom clip to hang it.
8. Close the door and make sure no one is entering while the negatives are being dried.
9. Check the results and the level of dust. If not satisfied, repeat.
10. Properly store your cleaned negatives.
Related Articles
- 6 Things Hurting Your Old Photographs — Learn what else can damage your photos and how to store them.
- Get a Free Restoration Quote — Send us your cleaned scans for professional restoration.