
What is photo restoration?
In our previous blog post, we have briefly described what photo restoration is and where it originated. Today we show you the different techniques we use when restoring damaged photographs.
Compared to traditional photo restoration we solely work with digital restoration tools. Digital photo restoration opens up completely new ways of repairing damages. Damages which, couldn't be repaired ten years ago.
"With Photoshop everyone can do his own photo restoration!"
This is something we hear quite often and technically it's true. Prices for image editing software such as Adobe Photoshop, Corel Paintshop or Adobe Lightroom have dropped dramatically over the last years. Nevertheless owning an ax and a hammer doesn't automatically turn you into a carpenter.
This is also the case for photo restoration. Good photo restoration is all about knowing which tool to use where and when. This needs a lot of expertise and experience.
A recent survey has shown that only 10% percent are satisfied with their own restoration work. Whereas 95% of the people needed at least twice as long as they expected.
The Tools
Adobe Photoshop offers plenty of different tools. Not all of them are necessarily useful when it comes to photo restoration. Here are the five most important ones.
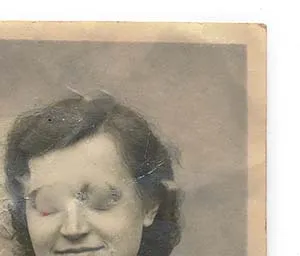
Spot Healing Brush
The spot healing brush comes in handy for all kinds of small damages such as dust particles, scratches or smaller cracks. The tool works by analyzing the surrounding areas and filling the selected spot with the calculated average of that.


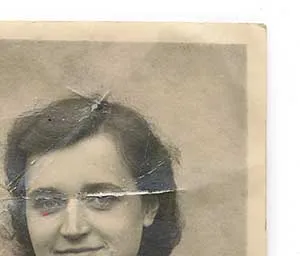
Therefore, it works best in large homogenous areas. As soon as the areas become more detailed and inhomogeneous the result is devastating.
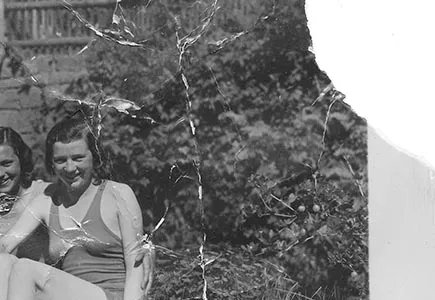
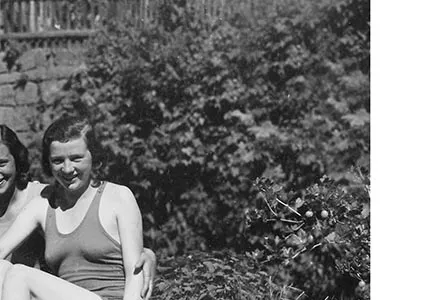
Clone Stamp
Clone stamp is a really important tool for repairing larger damages. It allows copying intact parts of the image into damaged areas. This tool is often used to reconstruct missing parts within an image.
Quick Selection Tool
The quick selection tool allows us to select pixels in a specific color range. It's often used to select objects or backgrounds. The tool works by calculating the difference from the current to the next pixel. If the next pixel's color/value lies within the set tolerance it will also be selected.

Curves
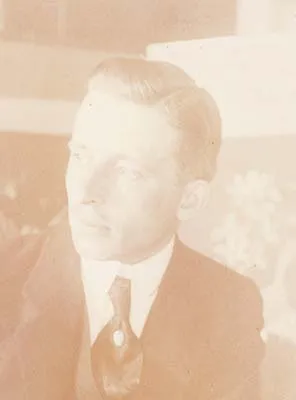
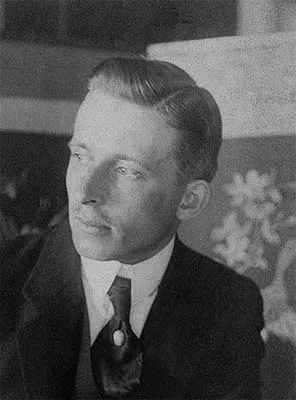
Almost all images have certain areas where contrast or color has faded. Curves enable us to darken or brighten certain ranges of pixels within the image. By doing so we can recreate the original color and brightness of the image. Curves even allow us to work in each of the color channels separately.

This is very important when neutralizing toning or color shifting. Understanding color theory is mandatory.
Layers
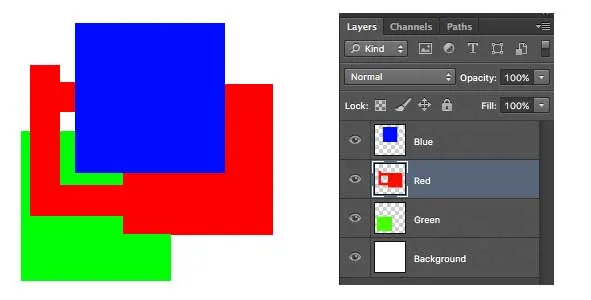
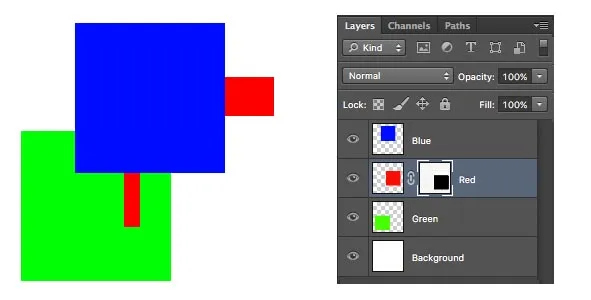
A key concept in photo editing is working with layers. Layers enable us to independently work on specific areas in a photo without altering the rest of the image.
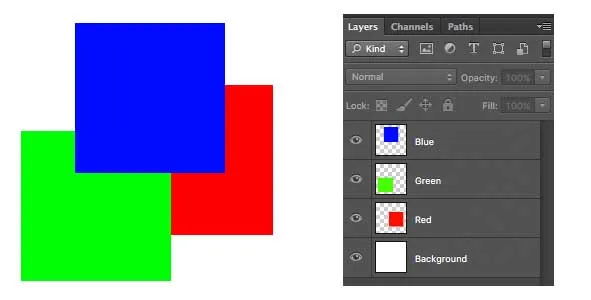
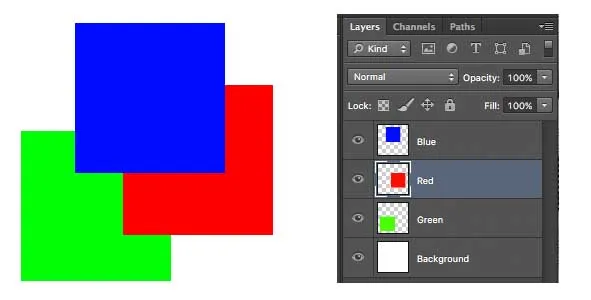
In a typical setup, content is split across layers so we can reorder them—for example, if we moved the red layer above the green layer, the stacking order changes what you see in the composite.
The great advantage is that we can individually edit each of those layers without affecting the others.
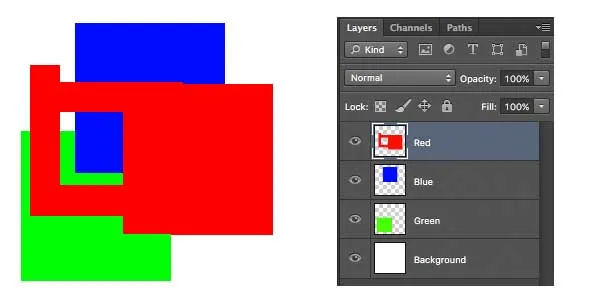
When we move the red layer all the way up in the stack, the final image reflects that order and we can refine the result non-destructively.
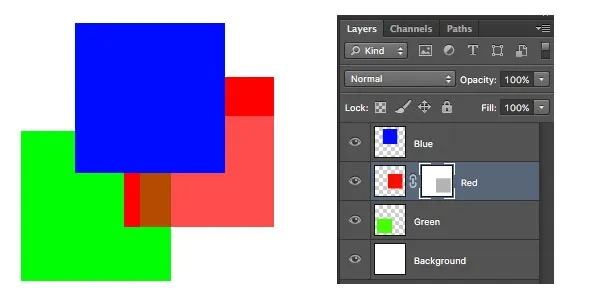
Layer Masks
Layers would be nothing without layer masks. These masks allow us to partially blend out certain areas of a layer. Layer masks only work in the grayscale mode. White means the layer is fully visible, black means it is not visible at all. By using different shades of grey it is possible to gradually blend out the layer. The small square to its right indicates the mask. As the square is white, those areas of the layer show through fully.

If we paint a grey square onto our layer mask, blending out parts of the layer becomes gradual rather than abrupt.
We can further darken the grey square to increase how much of the layer is hidden in that region.
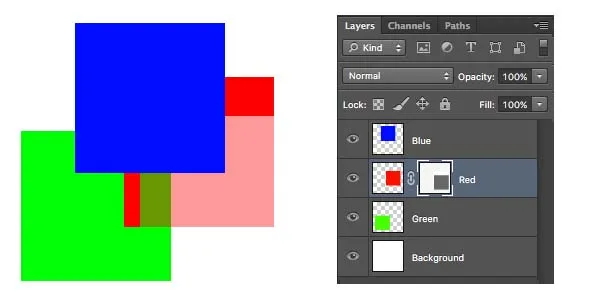
When we've turned the grey square within the layer mask to 100% black, that region of the layer is completely hidden.
Using them all together
These are just five basic tools used for restoring photos. The key is to know what to use when. Restoring water damaged photographs is fundamentally different than merging torn pieces or reviving faded colors. Photo restoration really is the champions league of photo editing.
See Our Work
- Before and After Examples — See real restorations from our clients.
- Our Services & Prices — Find the right restoration level for your photo.